Week 2 Summary
For Week 2 in the HPS program, the participants were asked to do a product teardown of a product containing injection molded parts. The goal of this teardown was to observe the plastic injection molding features present within the parts and the product as well. Features such as consistent wall thickness, smooth edges, and more were associated with signs of possible injection molding. A concept development sketch was created for the selected product idea of the ten mentioned before, with a rough idea of where the AIY project kit parts would be within their selected design. This can be considered the first concept sketch of what may be the initial CAD design. Finally, a Product Requirements Document (PRD) was produced for the selected product idea. The PRD outlines some basic functions of the product, mentioning the design considerations that will need to be addressed to ensure the product's features are present.
Product Teardown Research
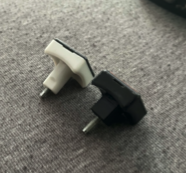
For the product teardown analysis, I decided to take apart one of my Rubik's cubes. Of course, the product was in the shape of a cube, but the product also needed to have each cube face rotate. The centerpieces did control some of the movement, since some of them had an extension to remain anchored to the core at all times. The Rubik's cube also needed proper lubrication, which prompted the need for the product to be easily taken apart. Regarding manufacturing design, a snap fit for the cap was seen for each cube face, and gates where plastic injection took place were shown on the underside of these same caps. The parts all had smooth edges, and gate marks were seen also on the more miniscule parts of the cube.

Concept Development
For the concept development, I was responsible for creating a typical sketch of how my chosen product would come together, which would incorporate the parts I would make along with the PCB and AIY kit components I was sent. Below is the sketch of my chosen product, the noisemaker. The design appears to only be made out of two main plastic injection molded parts, and there seems to also be more emphasis placed on sound getting out from all sides of the noisemaker. The button to activate the product would be placed at the top, and the ports would be accessed from the back.

Product Requirements Document(PRD)
When considering the functionality of the noisemaker, there are a few product requirements that I have. These requirements are ordered from most important (P0) to least important (P2).
The noise produced by the product must be able to be heard (P0).
The noise produced must last for at least 8 hours (P1).
The button must be able to start and stop the noise apart from the timer (P0).
The device must be able to withstand a person smacking the button (similar to one would with an alarm clock) (P1).
The noisemaker must be able to be anchored to the table so as not to disturb the sound distribution in any major way (P2).